 Click Here to Download: Code Associated With This Article Zip Archive, 4KB
In a 1996 article of The NT Insider (Volume 3, Issue 4, ?Save the Environment! Integrating Build and Developer Studio?), we discussed integrating the building of DDK-based components with Developer Studio (Probably V4.0). Well, we?ve come a long way since then. We now have Visual Studio.NET. Likewise, we now have a new DDK build environment that supports more platforms then ever before, so we though that we would revise DDKBUILD and at the same time, tell all of our readers how to use it.
A Little History
As you probably all know, the Visual Studio environment was not meant to support building components from the DDK, rather the ?build? facility was the method provided by the DDK. Various methods were produced over the years to work around this, by either using a tool that took the DDK ?SOURCES? file and converted it to a ?DSP? project file, or by going through the various Visual Studio menus and tweaking settings. While these methods both work, they are fragile and prone to errors. Thus, this is not really the way it should be done. So what?s a developer to do, if they want the luxury of using an Integrated Development Environment (IDE) like Visual Studio?
DDKBUILD
If a developer wants to build components in the DDK build environment, but still wants to use Visual Studio or Visual Studio.NET, then DDKBUILD.BAT is the way to go. DDKBUILD.BAT is a batch file that can be used as a ?makefile? type project from Visual Studio or Visual Studio.NET (A ?MAKEFILE? project allows the user to specify a ?Build command line? that can call any build utility that the user requests. A ?MAKEFILE? project is an option under C++ projects in Visual Studio.Net). What?s different about DDKBUILD.BAT is that it allows you to still use the supported ?BUILD? environment, but it allows you to do it from within Visual Studio, and allows you to most of the benefits that the IDE provides. Also, DDKBUILD can be used straight from the command line, never again will you have to bring up the correct build environment window, DDKBUILD can do it for you.
DDKBUILD is easy to use. The following is the syntax used:
?DDKBUILD ?PlatformOs BuildType BuildPath?
Where:
· PlatformOs ? The platform OS that the build is being done for. The support PlatformOs types are: WNET, WNET64, WNETXP, WNETXP64, WNET2K, WXP, WXP64, WXP2K, W2K, W2K64, and NT4.
· BuildType ? The type of build to be performed. It can either be ?checked?, ?chk?, ?free?, or ?fre?. ?fre? and ?chk? are equivalent to ?free? and ?checked?, respectively.
· BuildPath ? The path to the directory where the build is to be performed. This can be either ?.?, meaning the current directory, or the path to some other directory.
Using DDKBUILD.BAT from Visual Studio
In order to understand how to use DDKBUILD from Visual studio, let?s walk through the creation of a simple device driver project using the cancel sample in the Windows XP® DDK (src\general\cancel\sys).
First, start VS and from FILE/NEW select ?makefile? project. Next, fill in the Project Name and the Location. First select the location of the project. In order for DDKBUILD to work properly, the project file (.DSP) file should be in the same directory as where the ?SOURCES.? or ?DIRS.? file is located. This is so that when errors are reported in the build window, you can just double click on the error line and proper source file line will be displayed. Once you have selected the location, then fill in the Project Name, but be aware of one thing. When you type in a Project Name VS helps you by appending the project name to the end of Location Path. So again ensure that the location is where the ?SOURCES.? or ?DIRS.? file is located. Once this is done, press ?OK? (See Figure 1).
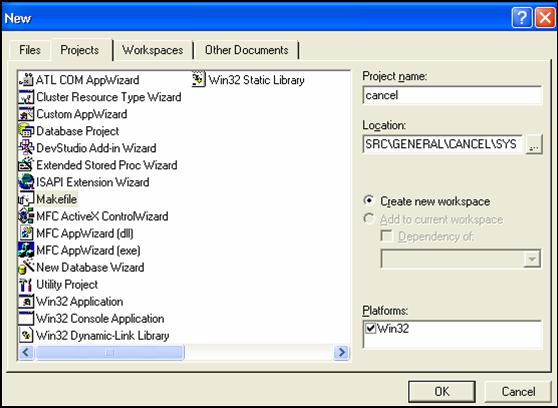
Figure 1 ? Creating the Project
After selecting the ?OK? button, you will be presented with the ?Makefile ?Step 1 of 2? window, where you are suppose to enter the information that allows you to build a DEBUG version of your software (See
Figure 2).
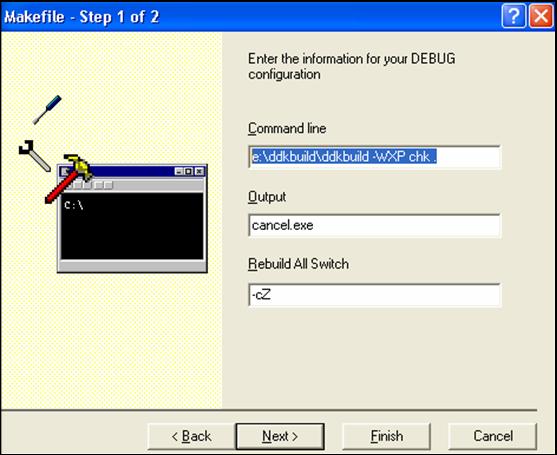
Figure 2 ? Entering CHECKED Build Info
For the command line, we used ?e:\ddkbuild\ddkbuild -WXP chk .?. This says run the DDKBUILD.BAT file located in e:\DDKBUILD, build a checked 32 bit component (we can build drivers, dlls, programs, etc with the ddk) in the current directory (?.? Is the current directory) using the Windows XP DDK. You can ignore the output name, since the name of the output file is not governed by VS, but by the TARGETNAME field located in your sources file. Finally the ?Rebuild All Switch? box is set to ?-cZ? (check out the build switches by typing ?build -?? in a build environment window). After this is set, we can click ?NEXT?, which will allow us to set up for a ?FREE? build, as shown in Figure 3.
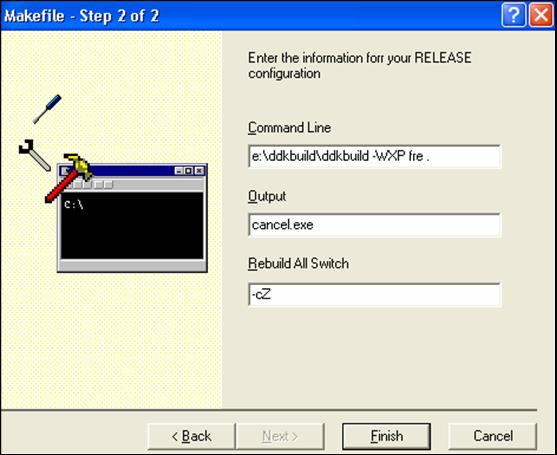
Figure 3 ? Setting Up FREE Build
Notice that the only thing that has changed from the DEBUG build is that instead ?chk? we have specified ?fre? which does a FREE build of our component. Now click ?FINISH? which will bring up a summary window on which you will click the ?OK? button. This leaves you with the window in Figure 4).
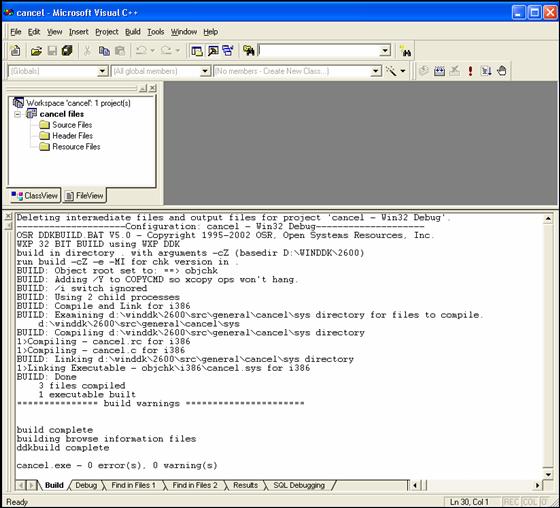
Figure 4 ? Vóila?Well, Almost There?
Notice that there are no source files, header files or resource files! Is this a problem? Now way, because all the components of this project are really described by the ?SOURCES.? or ?DIRS.? File. In fact just to illustrate that it works (as seen above), just select BUILD\REBUILD ALL from the menu. What you should see is exactly what is displayed above in the ?Build? output window. Okay, so big deal, you can build from the IDE. What about the other benefits?? Well, the next thing that you can do to make the VS environment useful to you is to add your files to the IDE. You do this by right clicking on the ?Sources Files? and adding your ?.C? and ?.CPP? file then adding your ?.H? files to the ?Header File? section as shown in Figure 5.
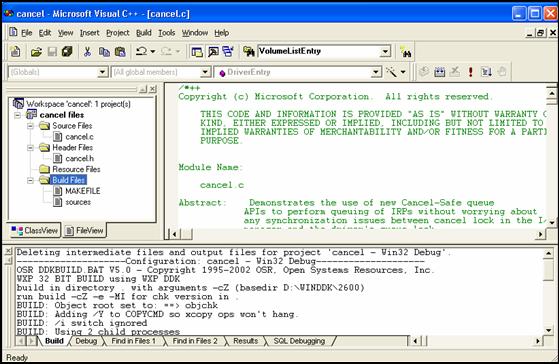
Figure 5 ? Add Your Files to the IDE
Notice also that I created a new folder (if you right click on a project you can create new folders also) called ?Build Files? where I put my ?SOURCES.? for easy access if I ever need to edit it to add a new file to be built.
Okay, now I can see my files. Big deal? Well yes it is, and let?s see why.Let?s suppose I am working on my ?cancel.c? file and I inadvertently put an error in it. When I build the file, the build window will contain the errors that were reported by the compiler. If I doubly click on the error then you will notice that the source window will display the line in error as seen in Figure 6.
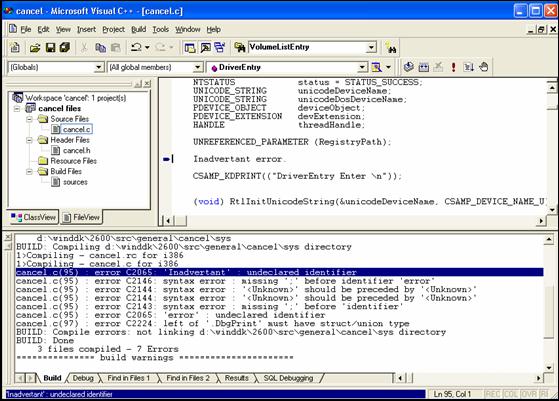
Figure 6 ? Viewing Compiler Errors
I don?t know about you, but I really hated it when I had to keep switching back and forth between my build command window and my editor so that I could correct the compiler errors. Now, I can do it all in one window. But wait, there?s more?. Let?s say that we need to add something to our PDEVICE_EXTENSION data structure, but can?t remember what .H file it is in (okay, there?s only one .h file in the project, but you know what I mean?) Wouldn?t it be nice if we could just right click on the data structure and have VS take us to it?s definition.
Well you can, you just have perform the following steps:
- Add the following 2 lines to your ?.SOURCES file:
BROWSER_INFO=1
BROWSERFILE=cancel.bsc ?n
Go to the PROJECT\SETTINGS dialog box and add cancel.bsc (the filename here just needs to match the filename that you put for the BROWSERFILE in your ?.SOURCES? file), in the edit box that is labeled ?Browse info file name?.
- Rebuild your driver.
If you did it right, then when you right click on PDEVICE_EXTENSION in the source window, you should see a menu dialog pop up that allows you to go the PDEVICE_EXTENSION definition in ?cancel.h?. Not only that, it will also allow you to right click on DDK definitions and it will take you to the appropriate DDK file.
A Word of Caution on Browse (.bsc) Files
One thing that I need to mention before continuing is that building browse files is a function of the IDE, not the DDK, so when your using the IDE, you must ensure that your are using the bscmake.exe file that comes with the proper Visual Studio that you are using. Browse ?.BSC? files are not compatible between the VS and VS .NET. Unfortunately, DDKBUILD cannot guess which IDE you are using, so it just uses the first one that it finds. So just do a ?WHERE bscmake.exe? from the command line to see which one is the default.
What Using the IDE Doesn't Do for You
There are a couple of things to remember if you decide to use DDKBUILD with the IDE. First of all, if you add a new file to the list of Source Files for you project, you still need to add it to your ?SOURCES.? File because that is the file that controls the build. Secondly, you can?t use the IDE to debug your driver, you still have to use WinDbg or your other favorite debugger. Finally, DDKBUILD was designed with Visual Studio in mind. While it should work with other IDEs, it has not been tested. If you want, try it out and let us know how it went, we?re always on the lookout to make things easier on the developers?.
Summary
DDKBUILD.BAT is the best way to go if you want to use an IDE to develop your driver and still want to use the support build environment. DDKBUILD is easy to use and we like it?.
You can download the latest version of DDKBUILD.BAT from the Resources section of http://www.osr.com