A New Framework
The NT Insider, Vol 11, Issue 2, Mar-Apr 2004 | Published: 03-May-04| Modified: 04-May-04
 Click Here to Download: Code Associated With This Article Zip Archive, 1,102KB Click Here to Download: Code Associated With This Article Zip Archive, 1,102KB
In this article, we’ll show you how to write a simple WDF driver. The hardware we’re going to be writing this driver for is a simple 24-channel digital I/O PCI card.
If you want to try this driver, and perhaps experiment a little, it’s available for download above. The driver is for the PIO-24.PCI card, Part #8008, made by Sealevel Systems, Inc. (www.sealevel.com). You’ll probably also want to order a model TA01 "Terminal Block Relay Rack Simulation Module", which is a fancy name for the 3 inch by 5 inch card, shown in Figure 1, with 24 LEDs and a set of switches. With this card, at least you’ll be able to play with the driver and see it blink the lights. The PCI card and the lights/switches card will cost you just under US$200 total, plus about $10 shipping within the US.
The driver we write for this device will support inputs and output, as well as interrupts. The driver will also support powering down the device during periods when it has no work to do. We’re not trying to show you how to write the simplest possible driver. Rather, we’re trying to show you a broad range of WDF features, so you can get a feel for how WDF actually works.
Before we get started, let’s discuss the usual restrictions. We’re writing a driver example here, not a production driver. The driver you can download, and the examples shown here, are for instructional purposes only. The only thing you should use this sample for is as a learning exercise. 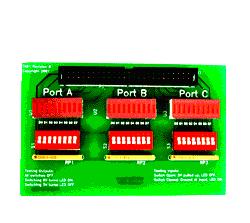
Figure 1 - Pretty Lights and Switches
And, of course, there’s still plenty of more development to be done on the Framework. So you should expect some of the details to change over time
Introducing The Kernel Mode Framework
The Windows Driver Foundation has a Kernel Mode Framework and a User Mode Framework. Because we haven’t spent any time here at OSR trying to play with the User Mode Framework, we’re going to confine our comments to Kernel Mode.
The Framework has an object oriented approach. Its basis is, therefore, a set of objects. You use methods to create these objects, and to set and get properties on the objects. The objects are abstract - You refer to them via handles, not by pointers.
The main types of objects that we’ll be dealing with in this example are:
-
WDFDRIVER - This object describes an instance of your driver in memory, including where it’s loaded, its attributes, and the devices that it serves. A WDFDRIVER object refers to, but is not identical to, a WDM DRIVER_OBJECT.
-
WDFDEVICE - This object describes a single instance of a specific device that your driver supports. The WDFDEVICE may be named or unnamed. It may optionally be made available to users for access using either a device interface GUID or a device name. WDFDEVICE objects have a very rich set of attributes, including PnP and power-related event processing callbacks. A WDFDEVICE object refers to, but is not the same as a WDM DEVICE_OBJECT.
-
WDFREQUEST - This object represents an I/O request. It refers to, but does not correspond directly to, an IRP in WDM.
-
WDFQUEUE - The WDFQUEUE object describes a particular queue of I/O Requests. Each WDFQUEUE is associated with a WDFDEVICE object. Each queue has a set of event processing callbacks that you can specify to request that your driver be called back when a request of a given type arrives at the queue. There may be more than one WDFQUEUE per device, and you can very easily specify how incoming I/O requests are to be distributed among those queues. By default, WDFQUEUEs are power managed, which means that they are automatically paused when the WDFDEVICE, with which they are associated is powered down.
-
WDFINTERRUPT - This object represents the device’s interrupt(s). Assuming your device supports interrupts, you’ll need one of these. It associates the device interrupts with an ISR and DPCforISR. If your device supports interrupts, you’ll also need to specify interrupt enable and interrupt disable event processing callbacks when your WDFINTERRUPT is created.
Your job as yeoman driver writer is to appropriately initialize and create these WDF objects and then "wire them up" so that they handle the work of your device correctly. Ready to go? Let’s get started.
DriverEntry
Every Windows driver starts with a DriverEntry function. In the Framework, the only two things you need to do in DriverEntry is instantiate your WDFDRIVER object, and tell the framework where to call you back each time one of your devices is discovered connected to the system. You’ll see the code to do this in Figure 2.
NTSTATUS
DriverEntry(PDRIVER_OBJECT DriverObj, PUNICODE_STRING RegistryPath)
{
NTSTATUS code;
WDF_DRIVER_CONFIG config;
WDFDRIVER hDriver;
DbgPrint("\nWDFDIO Driver -- Compiled %s %s\n",__DATE__, __TIME__);
//
// Initialize the Driver Config structure:
// Specify our Device Add event callback.
//
WDF_DRIVER_CONFIG_INIT_NO_CONSTRAINTS(&config, DioEvtDeviceAdd);
//
//
// Create a WDFDRIVER object
//
// We specify no object attributes, because we do not need a cleanup
// or destroy event callback, or any per-driver context.
//
code = WdfDriverCreate(DriverObj,
RegistryPath,
WDF_NO_OBJECT_ATTRIBUTES,
&config, // Ptr to config structure
NULL); // Optional ptr to get WDFDRIVER handle
if (!NT_SUCCESS(code)) {
DbgPrint("WdfDriverCreate failed with status 0x%0x\n", code);
}
#if DBG
DbgPrint("DriverEntry: Leaving\n");
#endif
return(code);
}
Figure 2 – DriverEntry
As you can see in the code in Figure 2, we start by initializing a WDF_DRIVER_CONFIG structure, specifying DioEvtDeviceAdd, as the function that we’ll use as our device add event processing callback. The initialization is performed using the WDF_DRIVER_CONFIG_INIT_NO_CONSTRAINTS macro.
After the WDF_DRIVER_CONFIG structure has been initialized, we create our WDFDRIVER object by calling WdfDriverCreate. We pass pointers to our Windows DRIVER_OBJECT and Registry Path as the first two arguments, which were provided to us by the I/O Manager as inputs to our DriverEntry function. We also pass a pointer to our initialized WDF_DRIVER_CONFIG structure, and pass NULL as the optional pointer into which the Framework will return us the handle of the WDFDRIVER object that it creates. Why NULL? We simply don’t need the handle in this function. The Framework will pass it to us later at our EvtDeviceAdd event processing callback.
Assuming our call to WdfDriverCreate returns success, when we exit from DriverEntry the next call to our driver will be at its EvtDeviceAdd event processing callback.
Object Creation In General
Stop for a second and note the sequence of operations that we performed in DriverEntry to create our WDFDRIVER object. This is important, because it’s a simple pattern that we’ll see repeated many times in any WDF driver that we develop. The pattern is:
-
Initialize a "config" structure using a "config init" macro
-
Fill in any optional fields in the "config" structure
-
Optionally create an object attributes structure if you need a callback on object destruction or if you need to associate context with the object
-
Create the object, specifying the config structure and the object attributes structure if you used one.
First, we allocate (in DriverEntry, this allocation is on the stack) and initialize a configuration structure. Configuration structures are typically named WDF_YYY_CONFIG, where YYY is the name of the object or feature for which the configuration structure is used. The initialization is performed with a macro. Initialization macros for configuration structures are typically named something like WDF_YYY_CONFIG_INIT. For example, you saw in DriverEntry that we initialized our WDF_DRIVER_CONFIG structure using the macro WDF_DRIVER_CONFIG_INIT_NO_CONSTRAINTS. This is a newer, and simpler, form of the original WDF_DRIVER_CONFIG_INIT macro (which seems to have been replaced).
After performing the initialization of the configuration structure with the macro, you may fill into the initialization structure any optional attributes or properties. In the case of the WDFDRIVER object that we create in DriverEntry in our example, we accept the defaults provided by the initialization macro, so we don’t fill in any additional fields in the WDF_DRIVER_CONFIG structure.
Prior to object creation, you may also optionally allocate and initialize a WDF_OBJECT_ATTRIBUTES structure. You may optionally provide object attributes for any WDF object that you create. WDF_OBJECT_ATTRIBUTES allows you to specify an object specific context (you’ll see how this is used when we create our WDFDEVICE object, later), as well as cleanup and destroy event processing callbacks for the object. The cleanup and destroy callbacks act like destructors, and are called when the object is last closed or last dereferenced.
Once the configuration and object attributes (if we’re using one) structures are properly initialized, and any optional fields in them filled in as needed, we create the object. This is typically done by calling a function named WdfYyyCreate, where Yyy is the type of object that you’re creating. In our example DriverEntry function, we call the function WdfDriverCreate. Assuming the call returns a success status, our WDFDRIVER object was successfully created.
Device Add
The Framework will call our driver’s EvtDeviceAdd event processing callback each time a new device that is handled by our driver is discovered in the system. EvtDeviceAdd is called with a handle to our WDFDRIVER object, and a pointer to a WDFDEVICE_INIT structure. The WDFDRIVER object is the one that we created in our DriverEntry entry point by calling WdfDriverCreate. The WDFDEVICE_INIT structure is a container for WDFDEVICE attributes that can be set before the WDFDEVICE object is created (this will become a bit more clear later, when we discuss how it’s used). Code for the EvtDeviceAdd event processing callback for our sample driver is shown in Figure 3.
WDFSTATUS
DioEvtDeviceAdd(WDFDRIVER Driver, PWDFDEVICE_INIT DeviceInit)
{
WDFSTATUS status = STATUS_SUCCESS;
WDF_PNPPOWER_EVENT_CALLBACKS pnpPowerCallbacks;
WDF_OBJECT_ATTRIBUTES objAttributes;
WDFDEVICE device;
PDIO_DEVICE_CONTEXT devContext;
WDF_IO_QUEUE_CONFIG ioCallbacks;
WDF_INTERRUPT_CONFIG interruptConfig;
WDF_DEVICE_POWER_POLICY_IDLE_SETTINGS idleSettings;
//
// Initialize the PnpPowerCallbacks structure.
//
WDF_PNPPOWER_EVENT_CALLBACKS_INIT(&pnpPowerCallbacks);
//
// Setup the callbacks to manage our hardware resources.
//
// Prepare is called at START_DEVICE time
// Release is called at STOP_DEVICE or REMOVE_DEVICE time
//
pnpPowerCallbacks.EvtDevicePrepareHardware = DioEvtPrepareHardware;
pnpPowerCallbacks.EvtDeviceReleaseHardware = DioEvtReleaseHardware;
//
// These two callbacks set up and tear down hardware state that must
// be done every time the device moves in and out of the D0-working
// state.
//
pnpPowerCallbacks.EvtDeviceD0Entry= DioEvtDeviceD0Entry;
pnpPowerCallbacks.EvtDeviceD0Exit = DioEvtDeviceD0Exit;
//
// Register the PnP and power callbacks.
//
WdfDeviceInitSetPnpPowerEventCallbacks(DeviceInit,
pnpPowerCallbacks);
//
// Create our Device Object and its associated context
//
WDF_OBJECT_ATTRIBUTES_INIT(&objAttributes);
WDF_OBJECT_ATTRIBUTES_SET_CONTEXT_TYPE(&objAttributes,
DIO_DEVICE_CONTEXT);
//
// We want our device object NAMED, thank you very much
//
status = WdfDeviceInitUpdateName(DeviceInit, L"\\device\\WDFDIO");
if (!NT_SUCCESS(status)) {
DbgPrint("WdfDeviceInitUpdateName failed 0x%0x\n", status);
return(status);
}
//
// Because we DO NOT provide callbacks for Create or Close, WDF will
// just succeed them automagically.
//
//
// Create the device now
//
status = WdfDeviceCreate(&DeviceInit, // Device Init structure
&objAttributes, // Attributes for WDF Device
&device); // returns pointer to new
WDF Device
if ( !NT_SUCCESS(status)) {
DbgPrint("WdfDeviceInitialize failed 0x%0x\n", status);
return(status);
}
//
// Device creation is complete
//
// Get our device extension
//
devContext = DioGetContextFromDevice(device);
devContext->WdfDevice = device;
//
// Create a symbolic link for the control object so that usermode can
// open the device.
//
status = WdfDeviceCreateSymbolicLink(device, L"\\DosDevices\\WDFDIO");
if (!NT_SUCCESS(status)) {
DbgPrint("WdfDeviceCreateSymbolicLink failed 0x%0x\n", status);
return(status);
}
//
// Configure our queue of incoming requests
//
// We only use the default queue, and we only support
// IRP_MJ_DEVICE_CONTROL.
//
// Not supplying a callback results in the request being completed
// with STATUS_NOT_SUPPORTED.
//
WDF_IO_QUEUE_CONFIG_INIT(&ioCallbacks,
WdfIoQueueDispatchSerial,
WDF_NO_EVENT_CALLBACK, // StartIo
WDF_NO_EVENT_CALLBACK); // CancelRoutine
ioCallbacks.EvtIoDeviceControl = DioEvtDeviceControlIoctl;
status = WdfDeviceCreateDefaultQueue(device,
&ioCallbacks,
WDF_NO_OBJECT_ATTRIBUTES,
NULL); // pointer to default queue
if (!NT_SUCCESS(status)) {
DbgPrint("WdfDeviceCreateDefaultQueue failed 0x%0x\n", status);
return(status);
}
//
// Create an interrupt object that will later be associated with the
// device's interrupt resource and connected by the Framework.
//
//
// Configure the Interrupt object
//
WDF_INTERRUPT_CONFIG_INIT(&interruptConfig,
FALSE, // auto-queue DPC?
DioIsr,
DioDpc);
interruptConfig.EvtInterruptEnable = DioEvtInterruptEnable;
interruptConfig.EvtInterruptDisable = DioEvtInterruptDisable;
status = WdfInterruptCreate(device,
&interruptConfig,
&objAttributes,
&devContext->WdfInterrupt);
if (!NT_SUCCESS (status))
{
DbgPrint("WdfInterruptCreate failed 0x%0x\n", status);
return status;
}
//
// Initialize our idle policy
//
WDF_DEVICE_POWER_POLICY_IDLE_SETTINGS_INIT(&idleSettings,
IdleCannotWakeFromS0);
status = WdfDeviceUpdateS0IdleSettings(device, &idleSettings);
if (!NT_SUCCESS(status)) {
DbgPrint("WdfDeviceUpdateS0IdleSettings failed 0x%0x\n", status);
return status;
}
return(status);
}
Figure 3 – Device Add Event Processing Callback
In the EvtDeviceAdd event processing callback, a WDF driver generally performs the following operations:
-
Initialize and create a WDFDEVICE object - This includes specifying any necessary PnP and power management callbacks to be used for this device.
-
Initialize and create one or more WDFQUEUE objects associated with the WDFDEVICE. At the very least, we’ll need a default queue, and we’ll need to specify where our driver is to be called when I/O Requests arrive for our driver to process.
-
Initialize and create a WDFINTERRUPT object. This object specified the interrupt service routine (ISR) and deferred processing callback for ISR completion (DpcForIsr) to be used by our device.
-
Initialize and specify any idle or wake properties associated with the WDFDEVICE.
Our example driver will fully support PnP and power management, and (just for fun) will even support automatically powering down the device when its not actively being used.
Plug and Play Callbacks
Looking at Figure 2, the first thing you can see our example driver doing in its EvtDeviceAdd event callback function is initializing a WDF_PNPPOWER_EVENT_CALLBACKS structure by calling WDF_PNPPOWER_EVENT_CALLBACKS_INIT.
Next, we specify event processing callbacks in the WDF_PNPPOWER_EVENT_CALLBACKS structure for EvtDevicePrepareHardware and EvtDeviceReleaseHardware. These two important callbacks are used to manage our device’s hardware resources. The Framework calls EvtDevicePrepareHardware with a WDFCOLLECTION of hardware resources for our device, each time hardware resources are assigned to our device. These hardware resources might be ports, registers, shared memory buffers, and interrupts, for example. If our device is never removed (unplugged) from the system, and it never surrenders its resources for potential use in resource rebalancing, our driver will be called exactly once at EvtDevicePrepareHardware for each device our driver supports. This callback will occur after EvtDeviceAdd has been called.
Typical things that you might do in your EvtDevicePrepareHardware event processing callback include: Saving away your device’s I/O port addresses and mapping any shared memory or registers on your device into kernel virtual address space. We’ll talk more about EvtDevicePrepareHardware later.
The Framework calls EvtDeviceReleaseHardware any time your driver must surrender the resources that had been previously allocated to your device. This can happen (a) when your device is removed from the system, or (b) when the PnP manager needs you to return your device’s resources temporarily in support of a "resource rebalancing" operation. Within your EvtDeviceReleaseHardware, all your driver needs to do is undo any work it did during the previous call to EvtDevicePrepareHardware for the device.
After we specify callbacks for EvtDevicePrepareHardware and EvtDeviceReleaseHardware, we specify callbacks for EvtDeviceD0Entry and EvtDeviceD0Exit. The Framework calls these event processing callbacks every time your device is about to move into or out of the D0 (fully powered, working) state. EvtDeviceD0Entry is first called during startup, after EvtDevicePrepareHardware has been called. It is also called any time the device is about to be powered up because the system (and thus your device) is returning from standby or hibernate or (if your device supports it) when your device is being awakened from an idle state.
EvtDeviceD0Exit is called any time your device is about to be powered down due to system shutdown, system suspend, or (if your device supports it) device idle.
With the WDF_PNPPOWER_EVENT_CALLBACKS structure initialized as necesary, we call WdfDeviceInitSetPnpPowerEventCallbacks, passing a pointer to the WDFDEVICE_INIT structure that was passed into our EvtDeviceAdd function by the Framework, and a pointer to the WDF_PNPPOWER_EVENT_CALLBACKS structure that we just finished initializing. This sets the attributes described by the WDF_PNPPOWER_EVENT_CALLBACKS structure into the WDFDEVICE_INIT structure that we’ll later use to create our WDFDEVICE object.
Object Attributes
The next thing we do in our EvtDeviceAdd callback is initialize a standard WDF_OBJECT_ATTRIBUTES structure, by calling WDF_OBJECT_ATTRIBUTES_INIT.
We then use the macro WDF_OBJECT_ATTRIBUTES_SET_CONTEXT_TYPE to associate the context structure type DIO_DEVICE_CONTEXT with our WDFDEVICE. This context structure is the non-paged per-device context that we’ll use for storage of most of the information about our device. In WDM, the WDFDEVICE context would be the Device Extension.
Name That Device!
Before we create our WDFDEVICE, we do one more thing. We call the rather strangely named function WdfDeviceInitUpdateName to establish a name for our device. Note that we set the name into the WDFDEVICE_INIT structure - which is the same place we set the PnP and power callback functions. Just like in WDM, this is the internal name of the device. If you want your device to be accessible to user’s by name, you’ll have to create a symbolic link. We describe how to do this a little later.
Create The Device
Now that the WDFDEVICE_INIT structure has been fully initialized with data such as the desired device name, and the PnP/power event processing callbacks, we’re ready to create the WDFDEVICE. We do this by calling WdfDeviceCreate, passing a pointer to the WDFDEVICE_INIT and WDF_OBJECT_ATTRIBUTES structures. We also pass a pointer to a location where WdfDeviceCreate will return to us a handle for the WDFDEVICE that we created.
Note that after creating the WDFDEVICE, we also create a symbolic link in the object manager’s name space for the name \DosDevices\WDFDIO. This will allow a user program to directly open our device using the Win32 function CreateFile, and the name "DWDFDIO."
Create A Queue
Now that we have a WDFDEVICE object that represents our device, and that WDFDEVICE has a name and a symbolic link that users could open and send requests to (once the device has been properly enabled), we should probably create a queue that can be used to present those requests to the driver.
Once again, we follow the typical pattern: We build a configuration structure, which in this case is a WDF_IO_QUEUE_CONFIG structure. We initialize that structure with an initializer macro, which in this case is named WDF_IO_QUEUE_CONFIG_INIT. This macro takes a pointer to the structure to be initialized, and three other data items:
The queue serialization model to be used by the queue: WdfIoQueueDispatchSerial, WdfIoQueueDispatchParallel, or WdfIoQueueDispatchManual. WdfIoQueueDispatchSerial simply says the WDFQUEUE will send your driver one request at a time. When you complete that request, it will give you another if it’s available. WdfIoQueueDispatchParallel will result in the WDFQUEUE calling your driver’s I/O callbacks as each request arrives at the queue.
In other words, you’ll get requests in parallel. WdfIoQueueDispatchManual allows you to manage the queue entirely by yourself, and relies on you calling WdfIoQueueGetRequest. An EvtIoStart event processing callback. If provided, this is the function that will be called if no more specific I/O request event processing callback applies. An EvtIoCancel event processing callback. If provided, the Framework calls this function when an I/O request is to be canceled.
In our example, we choose the simplest queue serialization model: WdfIoQueueDispatchSerial. We do not provide either an EvtIoStart or EvtIoCancel event processing callback function.
After calling WDF_IO_QUEUE_CONFIG_INIT, we fill in one additional field in the WDF_IO_QUEUE_CONFIG structure. This is the EvtIoDeviceControl event processing callback. Other possible callbacks that our driver could utilize include EvtIoRead, EvtIoWrite, and EvtIoInternalDeviceControl. When we’ve filled in all the callbacks for I/O events that you want to handle, we call WdfDeviceCreateDefaultQueue to create the default queue for our device
Fun With Queues
We think you’ll find WDFQUEUEs to be one of the nicest features in the Framework, because they give you lots of options for how I/O requests will be queued to your driver. It’s possible to create multiple queues, and either manually or automatically forward requests from one queue to the other. By default, queues are power managed. This means that when your device is powered down, any queues associated with your device are automatically "held." Of course, you can override this quite easily. Better yet, you can set things up to allow you to process, for example, device control requests even when your device is powered down, but to have the Framework automatically hold the queue that’s used for all the read and write requests for your device. Sadly, space doesn’t permit a complete discussion of all the fun you can have with WDFQUEUEs here. Perhaps we’ll have the time and energy to address this topic further in a follow-up article.
Recall that our sample driver provides no EvtIoStart callback, but does provide an event processing callback for EvtIoDeviceControl. Let’s examine the effect of this design. In reading the description below, it’s important to keep in mind that IRP_MJ_CREATE and IRP_MJ_CLOSE are currently handled in a separate way by the Framework. At present, these requests succeed by default. Thus, the procedures described below do not apply to create or close operations.
When the Framework gets a request for a device (other than a create or a close), it determines which queue will receive the request, and which of the driver’s event processing callbacks will be called, based on the request’s I/O function code. In identifying a queue, the Framework first looks for a specific queue to use. If one is not provided, it will use the default queue. Our example driver only creates the default queue, so that’s the one the Framework will use for all incoming requests.
Once a queue has been identified, the Framework looks to see which of the driver’s event processing callbacks it should call. If a specific I/O event processing callback that matches the
I/O request function code has been provided, the Framework places the request on the identified queue, and calls the callback (if appropriate). Whether or not the callback is called immediately depends on many factors including the device’s state, whether or not the queue is power managed, and the queues serialization method. If a specific I/O event processing callback that matches the request’s I/O function code has not been provided, the Framework checks to see if an EvtIoStart callback was specified. If so, then the request is placed on the queue and the EvtIoStart is called (again, whether or not the callback is called immediately depends on those same factors described previously). If no specific I/O event processing callback matching the request is provided by the driver, and no EvtIoStart callback has been provided, the request is completed with STATUS_NOT_SUPPORTED. Again, note that this process does not apply to either create or close operations, which presently succeed automatically.
So how does all this apply to our sample driver? Because we don’t supply an EvtIoStart function in our driver, and the only specific I/O event processing callback that we provide is EvtIoDeviceControl, any requests that arrive at our driver with I/O function codes other than IRP_MJ_DEVICE_CONTROL will be rejected by the Framework. The user will get back STATUS_NOT_SUPPORTED. Device control requests will be placed on the default queue,
and the driver’s EvtIoDeviceControl callback will be called eventually, depending on the state of the device and driver. So, you can see that in our sample driver, the only requests we support are create and close (because they are handled differently than described here) and Device Control.
Interrupts
Next, our sample driver initializes and creates a WDFINTERRUPT object. Once again, we use the same pattern we’ve been using all along: We create a configuration structure of type WDF_INTERRUPT_CONFIG and we initialize it using the macro WDF_INTERRUPT_CONFIG_INIT.
Note that there are two important callbacks that we need to fill into the WDF_INTERRUPT_CONFIG structure before the WDFINTERRUPT object is created. These are the EvtInterruptEnable and EvtInterruptDisable callbacks. These are called by the Framework when it wants our driver to enable or disable interrupts, respectively, on our device.
EvtInterruptEnable will be called to enable interrupts on our device after the Framework has called our EvtDeviceD0Entry callback, and after the Framework has connected our ISR to interrupts from our device.
You may be surprised to find that EvtInterruptDisable is called before your device enters any low power (non-D0) state, just prior to calling EvtDeviceD0Exit. This is because the Framework both disables your device interrupts, and disconnects it from your driver’s interrupt service routine whenever your device is powered down. This helps to avoid potential interrupt storms and other problems.
Power Down on Idle
As we mentioned earlier, just for fun we decided to add support for powering down our device while it was not being used. In WDM, this isn’t exactly a simple feature to implement. But in WDF, it’s a breeze. Note that, following the pattern once again, we initialize a WDF_DEVICE_POWER_POLICY_IDLE_SETTINGS structure by calling WDF_DEVICE_POWER_POLICY_IDLE_SETTINGS_INITWe note that our device implements idle support, and that it is not capable of waking itself while the system remains in S0.
In our example, we let the rest of the parameters default, including the idle timer which defaults to 5 seconds, and our idle power state which defaults to D3. We call WdfDeviceUpdateS0IdleSettings to set the parameters on the WDFDEVICE.
As a result of the idle policy we requested, the Framework will automatically transition our device to D3 after our device has been idle, receiving no I/O requests, for 5 seconds.
Wrapping Up EvtDeviceAdd
That’s all you have to do in your EvtDeviceAdd event processing callback to support a real device, with real interrupts, and add idle support on top of it. The rest of the driver’s functions are pretty straight forward. While we can’t go into the same level of detail that we have for DriverEntry and EvtDeviceAdd, let’s briefly look at the rest of the callbacks in our driver.
EvtPrepareHardware
As we mentioned above, this callback is called to present a set of device hardware resources, such as ports, shared memory addresses, and interrupts to your driver. Your driver’s job, during this callback, is to save any information that you may need (such as port addresses), as well as map any shared memory addresses into kernel virtual address space. The prototype for this function is:
NTSTATUS
DioEvtPrepareHardware(WDFDEVICE Device,
WDFCOLLECTION Resources,
WDFCOLLECTION ResourcesTranslated)
Note that the resources arrive in a WDFCOLLECTION. That means, to walk through your resources in this function, all you have to do is something like what’s shown in Figure 4 (note this is a code snippet, not a working code sample).
for (ULONG i=0; i<WdfCollectionGetCount(ResourcesTranslated); i++) {
//
// Get the i'th item from the collection of resources
//
hResourceTrans = (WDFRESOURCECM)
WdfCollectionGetItem(ResourcesTranslated, i);
//
// From that, get the Partial Resource Descriptor
//
resourceTrans = WdfResourceCmGetDescriptor(hResourceTrans);
if(!resourceTrans){
DbgPrint("NULL resource returned??\n");
return(STATUS_DEVICE_CONFIGURATION_ERROR);
}
switch (resourceTrans->Type) {
case CmResourceTypePort:
...
case CmResourceTypeMemory:
...
case CmResourceTypeInterrupt:
...
}
Figure 4 – Demonstration code for handling a WDFCOLLECTION
Another thing that’s worthy of note about your EvtPrepareHardware callback is that you do not connect your ISR to your device’s interrupt resource in this function. As previously mentioned, when the Framework wants you to connect your ISR to your device’s interrupt, it calls you at your EvtInterruptConnect event processing callback.
EvtDeviceD0Entry
As we mentioned above, this callback is called to each time your device is going to be transitioned into D0. For you WDM pros, it’s important to note that your driver is called at this entry point during the implicit transition to D0 that takes place during system startup. The prototype for this function is as follows:
NTSTATUS
DioEvtDeviceD0Entry(WDFDEVICE Device,
WDF_POWER_DEVICE_STATE
PreviousState)
The point of this callback is to let you do stuff that you need to do every time you enter D0. This might be downloading microcode to your device, or restoring previously the device state that you previously saved in your EvtDeviceD0Exit event processing callback when your device was being powered down.
EvtInterruptEnable
This interrupt is called with a pointer to your WDFINTERRUPT and WDFDEVICE, when the Framework wants you to enable interrupts on your device. The prototype for this function is:
BOOLEAN
DioEvtInterruptEnable(WDFINTERRUPT Interrupt,
WDFDEVICE Device)
Pretty straight forward, right? There’s not much more to say about this function.
Interrupt Service Routine
This routine is called when your device interrupts. The prototype for this function is:
BOOLEAN
DioIsr(WDFINTERRUPT Interrupt,
ULONG MessageID)
Note the parameter MessageID. This function is ready for Message Signaled Interrupt support in a future version of Windows.
Of course, your ISR runs at DIRQL. Therefore, there are very few functions that your driver can call from your ISR. To complete interrupt processing at a lower IRQL, you will want to queue a Deferred Procedure Call (DPC) for ISR completion, AKA a DpcForIsr. This is most easily done by calling the function WdfInterruptQueueDpcForIsr, passing a handle to your WDFINTERRUPT object.
DpcForIsr
Your DPC for Interrupt Service Routine completion will be called at IRQL DISPATCH_LEVEL. The prototype for this function is:
VOID
DioDpc(WDFINTERRUPT Interrupt,
WDFOBJECT Device)
Nice and clean, and no silly extra parameters like in WDM.
EvtIoDeviceControl
So, how exactly do you process I/O requests in WDF? Actually, it’s just as easy as everything else we’ve discussed so far. Recall that our driver only supports device control operations. The prototype for the EvtIoDeviceControl callback is:
VOID
DioEvtDeviceControlIoctl(WDFQUEUE Queue,
WDFREQUEST Request,
ULONG OutputBufferLength,
ULONG InputBufferLength,
ULONG IoControlCode)
Note that the function does not return a value (yay!), and that the most useful parameters are provided as input to your driver on the function call. The WDFREQUEST contains all the information needed to describe the I/O request.
You can get a pointer to a data buffer containing the user’s
InBuffer from the WDFREQUEST by calling WdfRequestRetrieveBuffer. This is the same function you would call to get a user’s data buffer when processing a read or a write operation.
You can get a pointer to a data buffer to be used to return data to the user’s OutBuffer from the WDFREQUEST by calling WdfRequestRetrieveDeviceControlOutputBuffer.
A couple of quick points about buffer handling in
WDFREQUESTS are in order here. What’s most interesting about the way buffers are handled for WDFREQUESTs is that their handling is uniform regardless of transfer type. What does this mean? Well, let’s say you’re processing a write request from a user. If you want a data buffer that contains the user’s data within kernel virtual address space, all you have to do is call WdfRequestRetrieveBuffer. It doesn’t matter if the request utilizes Direct I/O, or Buffered I/O. Pretty cool, huh? What? You say you wanted an MDL that describes a buffer, and not the buffer itself? Oh, in that case you just call WdfRequestRetrieveMdl. It really is just that simple.
When it comes time to complete a request, you use the following two functions:
WdfRequestSetInformation - This function takes a pointer to a WDFREQUEST and a value to set into the request’s Information field (IoStatus.Information).
WdfRequestComplete - This function takes a pointer to a WDFREQUEST and the status with which you want to complete the request. Poof! It’s done.
Need to return from one of your I/O event processing callbacks with the I/O request still in progress? No problem, just do it. Well, you probably want to store a handle to that WDFREQUEST someplace first, but all the complicated rules around returning STATUS_PENDING are gone.
In Summary
The place is here. The time is now. The Windows Driver Foundation, Kernel mode Framework will be replacing WDM. If you want a say in how it turns out, now’s the time to start learning the Framework.
The folks here at OSR have made it as easy as we can. Get the sample driver we’ve written. Join the WDF Beta program, the Framework distribution comes with lots of samples of varying complexity (yes, even DMA samples that work on real hardware).
We think once you try it you’ll agree WDF is pretty cool.
Want More Info?
We’ll be spending lots of space in The NT Insider talking about WDF in coming issues.
There are also a series of Whitepapers coming from Microsoft’s Windows Hardware and Driver Central team. Go check them out at www.microsoft.com/whdc. There’s even supposed to be a pretty decent, and up to date, paper on WDF PnP and power management. I recommend it highly.
User Comments
Rate this article and give us feedback. Do you find anything missing? Share your opinion with the community!
 Post Your Comment
|
|


